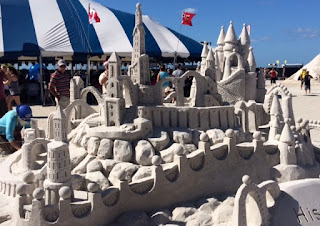
I had envisioned walking down the beach with water lapping at my feet while admiring sculptors at work on their creations. Instead, the event is held in a roped off area with a demonstration tent and vendors galore. (How else to make sure they get the $5 admission fee from gawkers?) Once inside the ropes, Bruce, Dorrit and I headed in to see what the event was all about.
There are categories in the competition for both "professional" and amateur sand sculptors. The day we checked it out, the advanced amateur and master doubles competitions were underway. Unlike the artists at the Sarasota Chalk Festival, these participants weren't keen to talk with visitors. Sure, they were working on deadline. But I also had the (snobby) sense that their views about their art weren't as well formulated as the articulate chalk artists. When I asked one amateur how he decided what to sculpt, he mumbled something about "too many recreational drugs" and went back to play in his sand.
The demo tent was home to music, quick sand competitions (which we missed) and daily demonstrations. Bill Knight and his wife Marianne are the owners and operators of the company that organized the event (aptly called The Sand Lovers). Knight was on hand to give a demo that let the audience in on some of the tricks of the trade.
The question on everyone's minds was, "What do you put in the sand to make it stay in place?" The answer is simple: water. While a concoction of one part Elmer's Glue to ten parts water is spritzed on the final sculpture, its purpose is to prevent wind and sand erosion, not to hold the sculpture together. Knight analogized it to paint on a house (which, he pointed out, has nothing to do with the construction of the building). And in case you're wondering, Elmer's Glue is apparently bio-degradable and environmentally friendly. Who knew?
Knight shared some handy tips on how to make your own sand castle using some simple tools. The first step is to make sure your sand is totally wet. For your base, use a pail with the bottom cut out. (The bottom traps the air and makes the sand stick to the pail.) Once the sand has set--about five minutes--tap the bucket and then remove. Voila! If you want to get fancy, build a double
or triple decker using increasingly smaller buckets. A funnel can be used to create the perfect top to your castle.
Once you're ready to get sculpting, make sure to start at the top. (This isn't for reasons of stability, but because you don't want the sand you are carving away to fall into work you've already done.) Offset spatulas and trowels are great tools for shaping. Windows can be made using offset knives or melon ballers. Don't forget straws, paintbrushes and make-up brushes to get rid of loose sand.
Knight assured us that if we followed these easy instructions, we would be able to make an awe inspiring sand castle. Sounds like a plan for my next outing to the beach.


Oh. My. God. now i need to schedule to come down for the chalk art AND this!
ReplyDelete